Zero to Agent in 30 Minutes: Your Foundry Setup
M
I am a software architect with over a decade of experience in architecting and building software solutions.
Search for a command to run...
No comments yet. Be the first to comment.
In this series, I will be explaining AI in a structured, step-by-step manner, helping readers "decode" complex topics.
If you've been watching the AI space from the sidelines and thinking, “This all looks interesting, but where does a C# developer even begin?”, you’re not alone. Most of us started there.AI agents seem
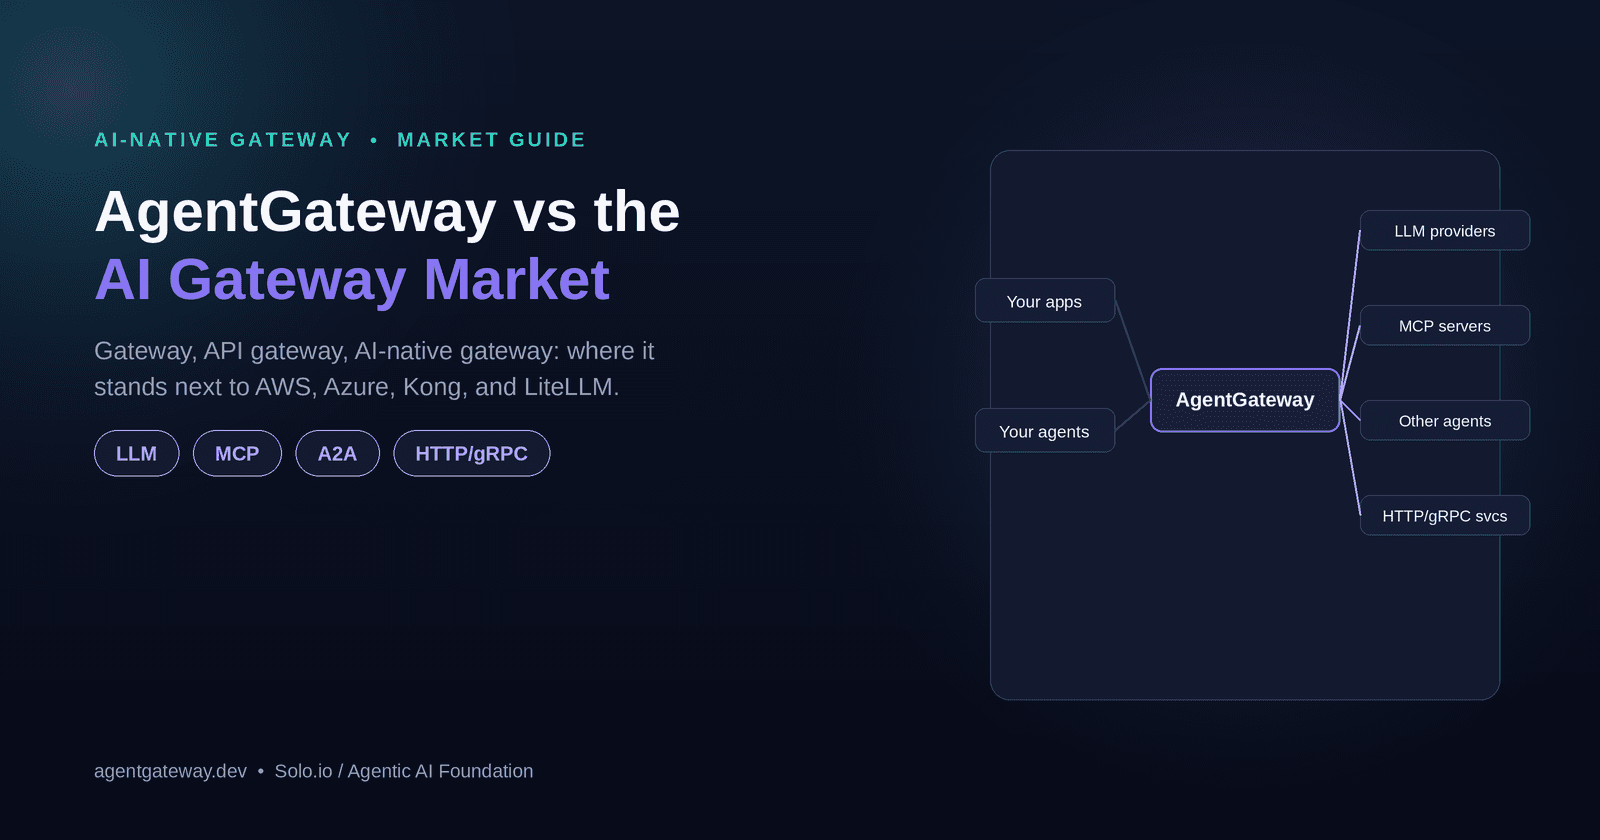
Gateway, API gateway, AI-native gateway: the concept ladder, the real players, and where AgentGateway actually stands next to AWS, Azure, Kong, and LiteLLM.
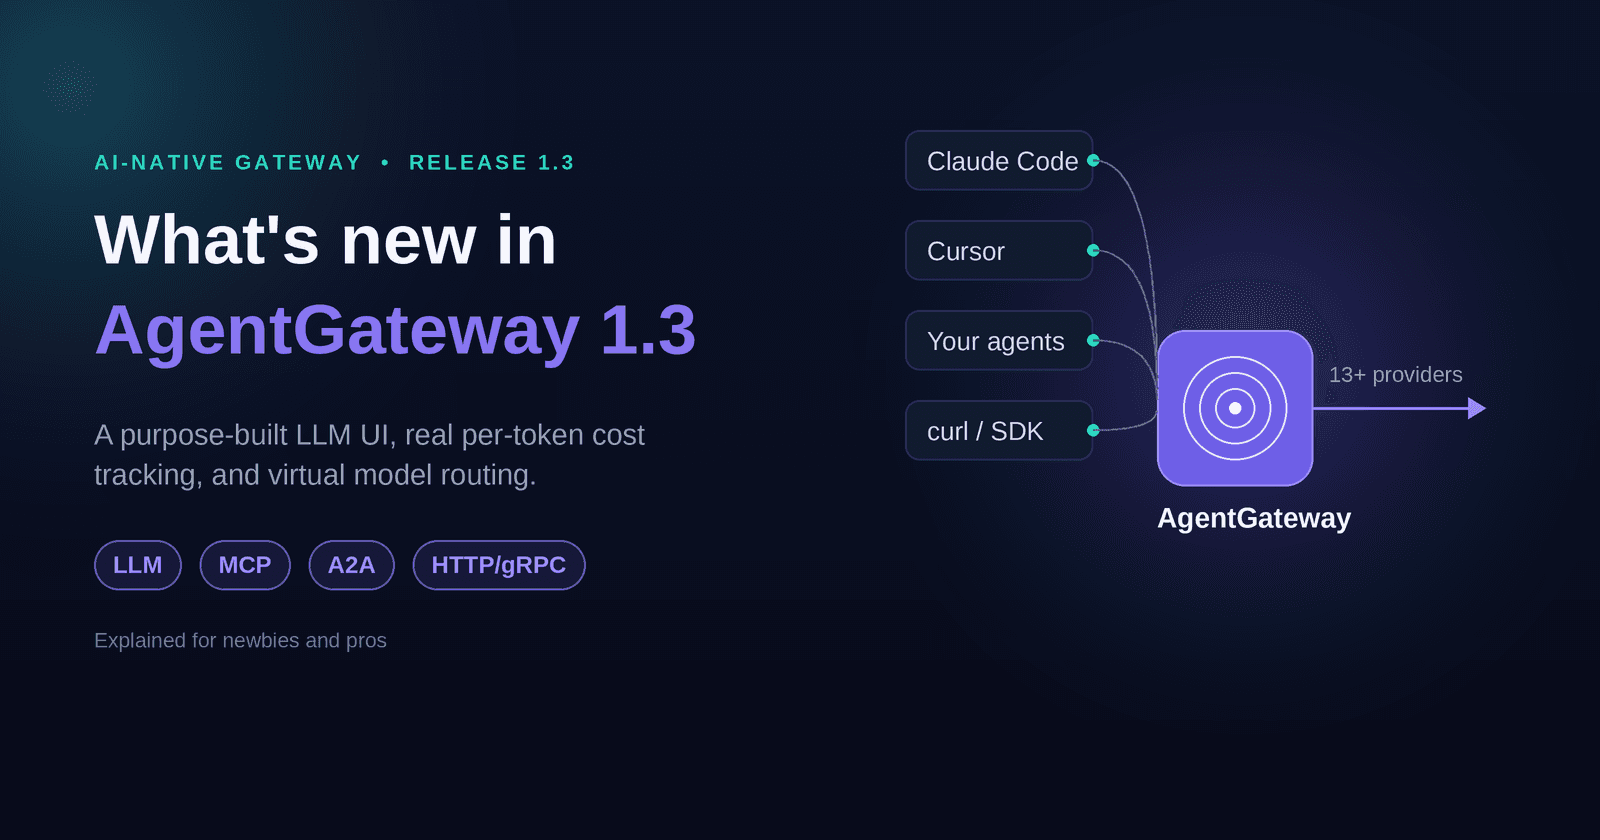
The biggest LLM-consumption release yet: a purpose-built UI, per-token cost attribution, and virtual models that reroute traffic without touching a single client.
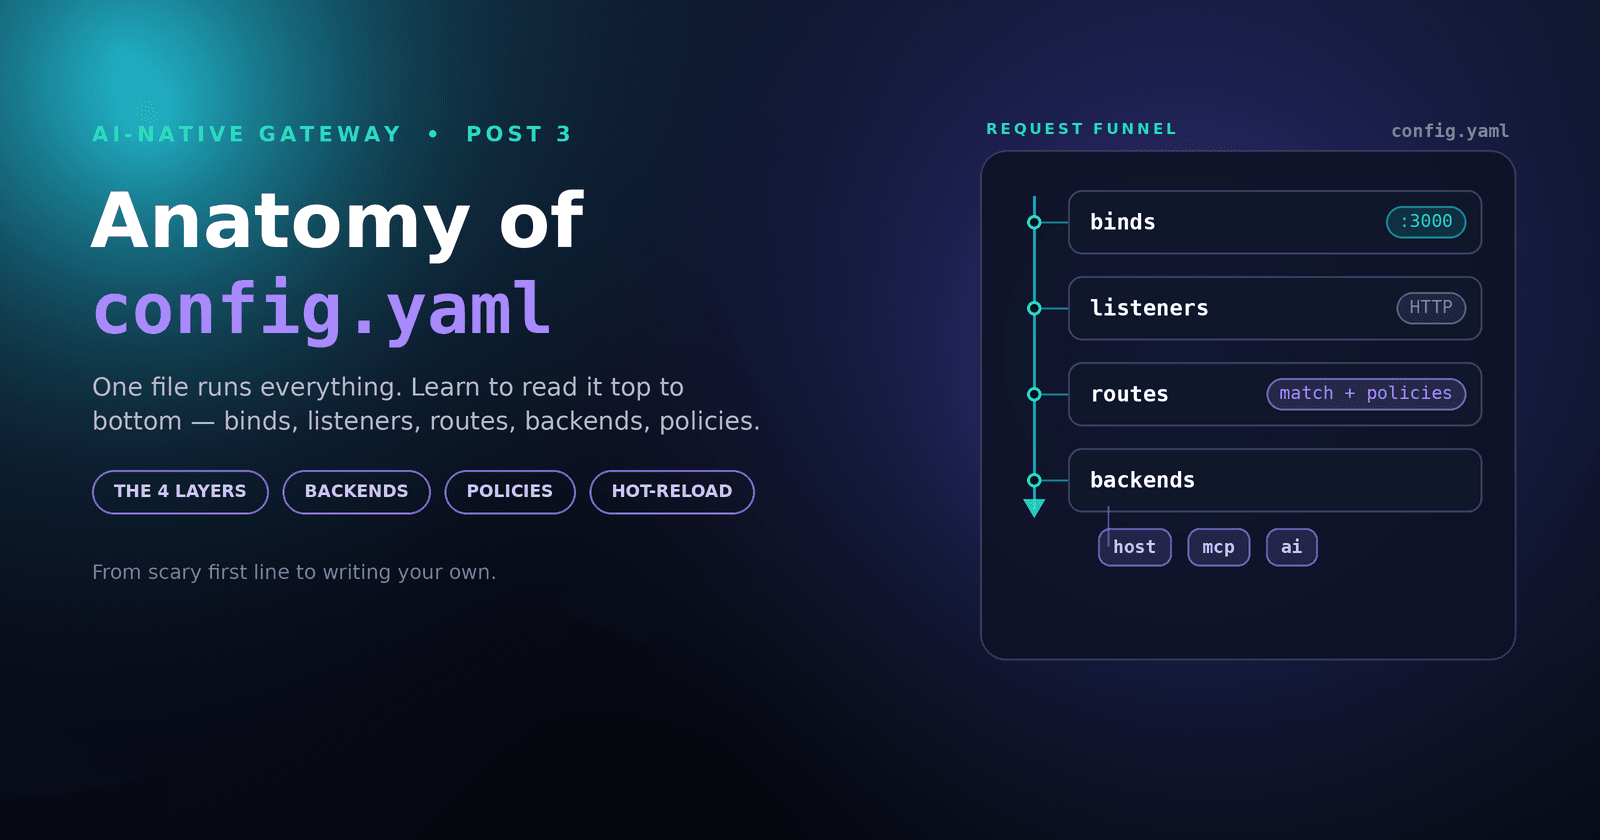
One file runs everything — binds, listeners, routes, backends, policies. Here's how to read it top to bottom, and why the same skeleton powers an MCP gateway, an LLM gateway, and a plain proxy.
No Rust, no Docker, no compiling. Grab the Windows binary, write a tiny config, and watch a real MCP tool server show up in your browser.

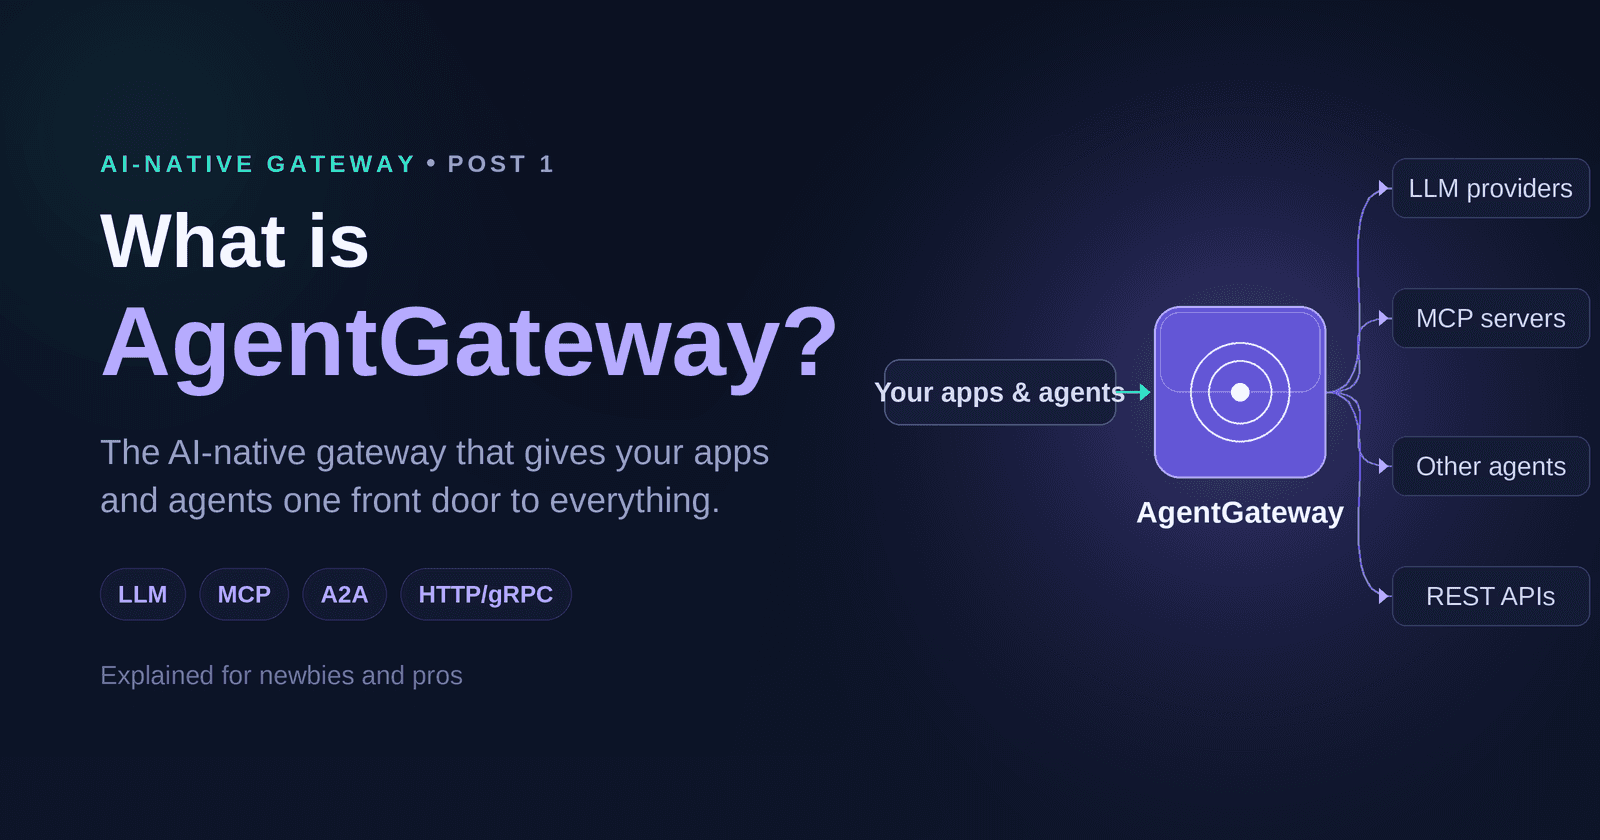
One open-source proxy for LLMs, MCP tools, agents, and your regular APIs, plus the data-plane and control-plane vocabulary you'll keep running into.
If you’ve been following the excitement around AI agents, you’ve probably noticed that most tutorials still scatter essential steps across several tools, repos, and half-finished guides. When I started down this path, I kept wondering: why isn’t there a simple, single place where a C# developer can get up and running?
This chapter is that starting point.
In the next 30 minutes, you’ll install everything you need, configure your development environment, scaffold your first agent project, and validate it with a simple “Hello Agent” test. After this, you’ll be ready for real agent coding without wrestling with setup hurdles.
By the end of this chapter, you will have:
A one-command installation for the full agent development stack
A working VS Code or Visual Studio environment configured for .NET 8 + Agent Framework
A clean agent project structure generated and ready to extend
A functioning “Hello Agent” test that proves your setup is correct
Your takeaway: a ready-to-code development environment for building Foundry-compatible AI agents.
Let’s begin with the simplest possible setup.
Instead of juggling multiple runtime dependencies, install:
winget install Microsoft.DotNet.SDK.8
winget install Microsoft.VisualStudioCode
We will install this directly into the project; no global installation is required.
That’s really it. There’s no extra CLI layer, no complex environment manager, and—importantly—you do not need Foundry Local for this tutorial. I will explain more about that later.
You can use either Visual Studio 2022 (17.9+) or VS Code.
Both work well, but for quick iteration VS Code is surprisingly efficient.
.NET 8 SDK workload
C# Dev Kit (optional but helpful)
C# Dev Kit
IntelliCode
.NET Install Tool (auto-detects SDKs)
Once your editor is ready, verify that .NET is correctly installed:
dotnet --version
You should see something like:
8.0.101
Now you’re ready to build.
Let’s initialize a clean agent project from scratch.
dotnet new console -n MyFirstAgent
cd MyFirstAgent
dotnet add package Microsoft.AgentFramework
This package gives you the core abstractions—agent lifecycle, messaging, model access, and tool integration—without requiring Foundry yet.
Replace your Program.cs (or Program.cs + Agent class) with the following minimal example:
using Microsoft.AgentFramework;
using Microsoft.AgentFramework.Abstractions;
using Microsoft.AgentFramework.Hosting;
using Microsoft.Extensions.DependencyInjection;

var builder = Host.CreateDefaultBuilder(args)
    .ConfigureServices(services =>
    {
        services.AddOpenAIChatModel(options =>
        {
// Ensure you've added OPENAI_API_KEY values in the System's Environment variable
            options.ApiKey = Environment.GetEnvironmentVariable("OPENAI_API_KEY")!;
            options.Model = "gpt-4.1-mini";
        });

        services.AddAgent<HelloAgent>();
    });

var host = builder.Build();
await host.RunAsync();

public class HelloAgent : IAgent
{
    private readonly IChatModel _model;

    public HelloAgent(IChatModel model)
    {
        _model = model;
    }

    public async Task RunAsync(CancellationToken cancellationToken)
    {
        Console.WriteLine("Hello Agent is now running. Ask anything:");

        while (!cancellationToken.IsCancellationRequested)
        {
            var input = Console.ReadLine();
            if (input?.ToLowerInvariant() == "exit") break;

            var reply = await _model.GenerateAsync(input, cancellationToken);
            Console.WriteLine(reply);
        }
    }
}
This is not a mock-up or pseudocode—it's a real, runnable agent powered by the Microsoft Agent Framework.
Run your program:
dotnet run
You should see:
Hello Agent is now running. Ask anything:
Try typing:
Hello
If the agent responds with a generated message, congratulations—you now have a working agent environment, and your setup is validated.
This is your foundation for every upcoming chapter—tools, memory, workflows, debugging, and eventually deployment into Foundry.
By the time you finish this chapter, you have:
A complete .NET + Agent Framework environment
A scaffolded agent project
A running “Hello Agent” to prove your setup works
No Foundry dependencies yet—keeping the barrier to entry low
You’re now standing on a clean, solid foundation ready for the next chapter:
Agent Anatomy 101: Brain, Tools, and Memory.